Showing posts with label make money with blog. Show all posts

Saturday, 24 December 2016

Advanced Blogging: How to Make Your Blog Serve Your Business


Do you have a blog?
Want to supercharge your content and increase email subscribers?
To explore advanced techniques for improving blog content, collecting more email addresses, and promoting products and events, I interview Darren Rowse.

More About This Show

The Social Media Marketing podcast is an on-demand talk radio show from Social Media Examiner. It’s designed to help busy marketers and business owners discover what works with social media marketing.
In this episode, I interview Darren Rowse, one of the world’s leading experts on blogging. He’s the founder of two popular blogs: Digital Photography School and ProBlogger. He also co-authored the book ProBlogger and hosts the ProBlogger podcast.
Darren shares how he learned to better serve the needs of his readers.
You’ll discover how Darren uses portal pages and what goes into creating them.
Advanced Blogging: How to Make Your Blog Serve Your Business featuring insights from Darren Rowse on the Social Media Marketing Podcast.
Share your feedback, read the show notes, and get the links mentioned in this episode below.

Listen Now


Here are some of the things you’ll discover in this show:

Advanced Blogging

Determine What Type of Content to Create
Darren started by writing what he was excited about in the moment, and he believes that’s a great place for bloggers to start because their writing comes across as passionate. However, for bloggers to build expertise in a niche, he notes, they need to put more thought into it. Darren says there are two parts to achieving that outcome.
First, you need to understand the people who read your blog and what their needs are. Ultimately, Darren’s content ideas come from the conversations he has with readers; this determines what he writes about.
Second, you should develop before and after avatars. The before avatar represents who his readers are when they come to the blog, and the after avatar represents who he wants his readers to become. Use your avatars to fill in what your readers need to move from the before avatar to the after avatar, he explains.
For example, readers first come to the Digital Photography School blog because they don’t know how to use their cameras to full potential. The “after” readers have full creative control of their cameras, along with the confidence, knowledge, and technical skills to get out of automatic mode and take their photography to the next level. Give them what they want and sell them what they need.
For example, readers who come to Darren’s blog to get photography tips realize they need more help when they return from vacation and discover their photos didn’t reflect their journey. His ebook, A Guide to Captivating Travel Photography: Transcending Travel, delivers the things they didn’t realize they didn’t know, such as tips to help lift their photos.
Digital Photography School is filled with posts on tips and techniques.
Digital Photography School teaches readers how to use their amazing cameras.
Darren used this exercise for the first time in 2006, and came up with 200 things his blog readers needed to know. Those notations became the first 200 posts on the site.
Listen to the show to discover how Darren uses what he knows about what people need to collect email subscribers, attract Facebook fans, sell products, and more.
Develop an Editorial Strategy
Darren shares the nine different elements he and his team work through each year to figure out their editorial strategy.
  • Voice: Is your content more conversational, teaching, or storytelling?
  • Evergreen vs. Time-sensitive Content: What’s the proper ratio? Darren’s photography blog leans more toward evergreen, but he notes others may need to create more time-sensitive content.
  • Intent: Is your aim to inform, inspire, educate, or interact? Darren’s blogs focus on information and education, but mix in inspirational and interactive content here and there. As an example of content created to drive interaction, Darren says Digital Photography School does a challenge post each week in which they prompt readers to take photos using a specific technique and then share the photos in the comments.
Digital Photography School offers challengers to readers in their posts.
Digital Photography School has challenge posts in their content mix.
  • Format: What type of content will you publish? Darren explains that he intentionally creates a mix of reviews, editorials, opinion pieces, news, and case studies. After recently completing this process with ProBlogger, he realized they hadn’t published enough case studies for a while. Now they have a goal to do a case study every other week.
  • Authorship: Are you a single or multiple author blog? If you have multiple authors, do you have a high number of random guest posts or a regular writing team? That’s something Darren says has changed on his blogs over the years. He started by writing everything himself, moved to many guest posts, and now publishes posts authored by subject-matter experts.
  • Frequency: Will you publish daily, weekly, or monthly? Again, this has changed for Darren over time. ProBlogger went from publishing twice a day to once a day, and recently moved to five posts a week.
  • Content Length: Will your posts be short or long?
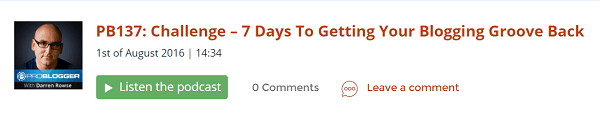
  • Stand-alone vs. Series Posts: Will you publish one-off stand-alone posts or focus a series of posts on a single topic? For example, on his podcast, Darren did a seven-day challenge series on finding a blogging groove. ProBlogger recently published a week of posts on content creation: a case-study post, an interview post, and a couple of tutorials. While this approach let them cover a big topic, Darren cautions it could frustrate readers who aren’t interested in that week’s topic.
Darren has been experimenting with series posts, like this one, which is a blogging challenge.
Series posts are one way to engage viewers on a particular topic.
  • Matrix: You essentially have four types of content to consider here: written, video (live or recorded), audio, or visual. Darren says ProBlogger intentionally delivers mainly written content, but also has a regular podcast.
Listen to the show to hear how interactive content has changed.
About Portals
On most blogs, the last thing posted is the first thing readers see. If new readers happen to see something that’s good on the front page, that’s great. Yet that’s not often the case. ProBlogger, for example, has 8000 pieces of content, 95% of which is evergreen. This is why they’ve been toying with how to get the right content in front of people at the right time.
If you scroll down the front page of ProBlogger, there’s a heading that says, “I need help to…”, and visitors can choose Start a Blog, Create Content, Find Readers, Build Community, Make Money Blogging, Be Productive, Understand Technology, and Get Work.
ProBlogger created eight content portals for their readers.
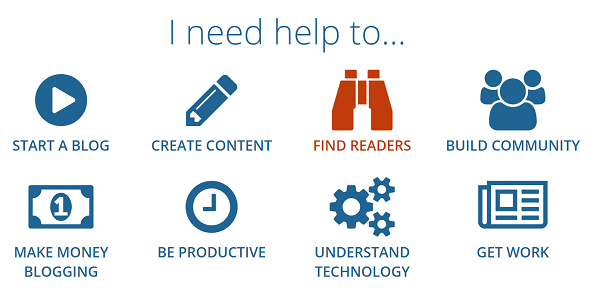
Using their portals, ProBlogger readers can easily find the content they want.
After users click on a topic, they’re sent to a portal that features a video of Darren. Darren talks about his own challenges in the area and how to use the page. While he plans to build an opt-in for each of the portal pages, currently there’s only one: Create Content.
Underneath the video, in the Start Here section, are six of the best posts on that topic, which cover beginner information and some of the frequently asked questions they’ve fielded. This is followed by the Latest section, which features recent content from the blog and podcast. Darren notes that users can play a podcast right from the page.
ProBlogger shares beginning and the latest content on a topic with their readers
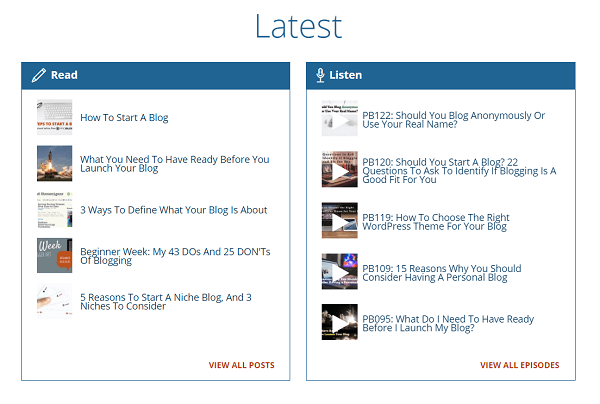
The latest content on a certain topic is in the middle of each portal.
Below the Start Here and Latest sections, there’s a product, offer, or other related recommendation. Each portal page is focused on getting people to content because that’s what will sell them on subscribing to the site.
Listen to the show to find out when Darren started experimenting with portals and hear about his initial findings.
Determining Portal Topics
Darren says determining the portals was more or less intuitive because he knows why people come to the site, what the most frequently asked questions are, and which content is most popular. Still, he made a point to survey readers to learn about their big challenges and main questions.
The site started with four portals: Create Content, Find New Readers, Build Community, and Make Money Blogging. Then Darren realized there was a massive amount of readers looking to start a blog, so Start a Blog became another portal. The last three portals grew from what he learned from survey responses.
Listen to the show to discover why the portal pages are so popular.
The Unique Home Page
Darren explains how they’re also designing their front page to function like a portal. One of the things they’re trying is using cookies to show different things to different people, depending on whether they’ve been to the site before.
Today, if someone comes to ProBlogger for the first time, they’ll see a page designed to create a good first impression. Under the words “Become a ProBlogger,” a quick history of the site includes links to their portals and the Start Here page. People can also subscribe from there.
ProBlogger's home page is different for new visitors to the website.
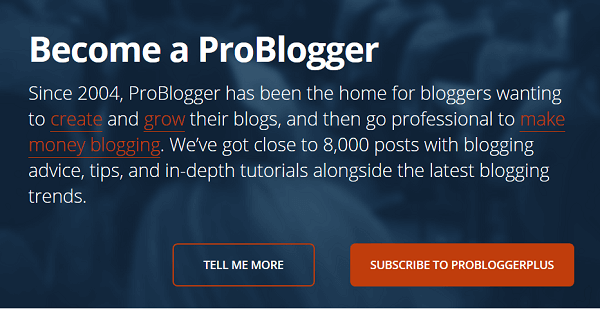
ProBlogger presents a customized start page for new visitors.
A returning visitor will see the words, “Welcome Back,” as well as the latest blog post and podcast. This page also asks, “Are you subscribed?”
ProBlogger remembers returning visitors to their blog.
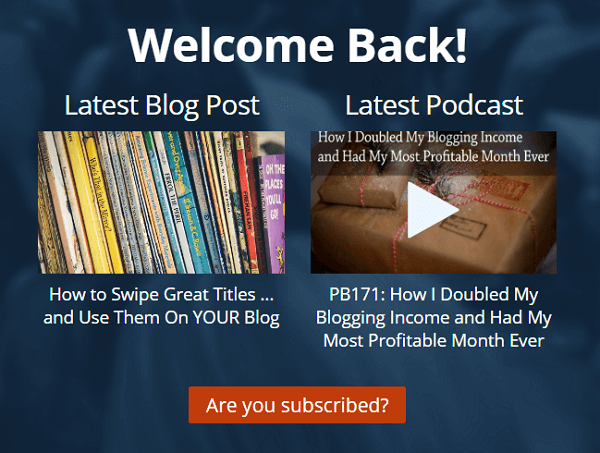
Returning visitors are remembered on ProBlogger.
Listen to the show to learn how ProBlogger is able to give a different experience to new or returning visitors.
About Welcome Mats
Darren says when Digital Photography School started using pop-ups 10 years ago, signups to their newsletter increased. Darren was happy with that and says he got a bit complacent. Then he started seeing friends use welcome mats.
He says a welcome mat takes over the whole page and forces readers to hit “No Thanks,” close the mat, or subscribe. With a welcome mat, he says, they were typically seeing twice the conversions of a pop-up, and he’s since started using them on ProBlogger.
He believes a welcome mat is a little more elegant than a pop-up because the mat slides down the page.
Digital Photography School's home page is different for new visitors to the website.
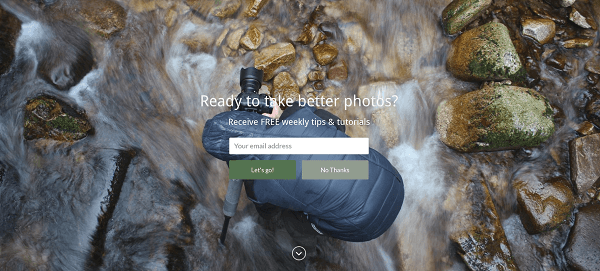
The welcome mat opt-in doubled Digital Photography School’s conversions.
He discusses several features of welcome mats, including the ability to add images and video to the slider, as well as configurations that will let you set them up to not show on certain pages or to only show to certain types of traffic visitors (like visitors who come from Google, Facebook, or Twitter).
You can choose to show one version to Facebook traffic and a different version to people who come from Twitter, show different offers to different audiences, or design a welcome mat for a particular post.
Darren shares that he uses both SumoMe and OptinMonster for welcome mats.
Tools, like OptinMonster, allow users to create a Welcome Mat.
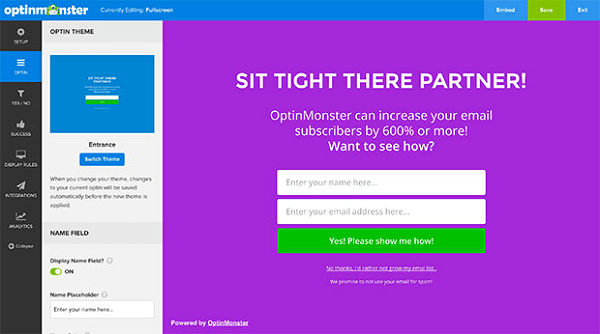
OptinMonster (shown) and SumoMe have great welcome mat options.
While welcome mats work on both mobile and desktop, Darren offers a word of warning. A few months ago, Google announced they’re going to start penalizing sites that interrupt the mobile experience. So in January Darren will stop using a welcome mat on his mobile sites.
Darren talks about the types of testing he’s done with welcome mats and suggests others test different type fonts, colors, and calls to action when experimenting with welcome mats on their own.
Listen to the show to hear the reaction of Darren’s audience to the welcome mat.

Discovery of the Week

Patch, a smart portrait editing app for iOS, automatically edits your images and simulates a blurred background effect that lets the subject of your photo stand out.
Use the Patch app for smart portrait editing on your iOS devices.
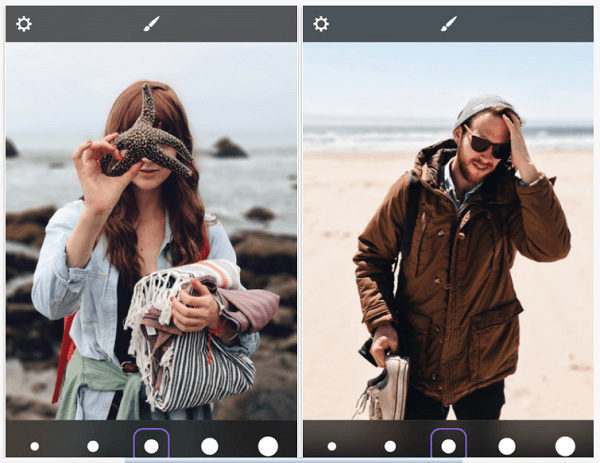
The Patch app blurs the background on your mobile photos, which makes them look a lot better.
Open up an image inside the app, turn up the intensity, and in 10 seconds the image is processed from a cell phone selfie into something worthy of framing.
You can use images from the built-in camera on your phone, uploaded images, or imported photos from your camera roll. So if you’re at a conference and take a bunch of awesome selfies, you can process them afterward!
Patch is free in the App Store but offers watermark removal for a 99 cent fee.
Listen to the show to learn more and let us know how Patch works for you.
Listen to the show!
Audio Player

Key takeaways mentioned in this episode:

  • Learn more about Darren on ProBlogger and Digital Photography School.
  • Listen to ProBlogger podcast.
  • Read ProBlogger.
  • Check out the travel photography ebook.
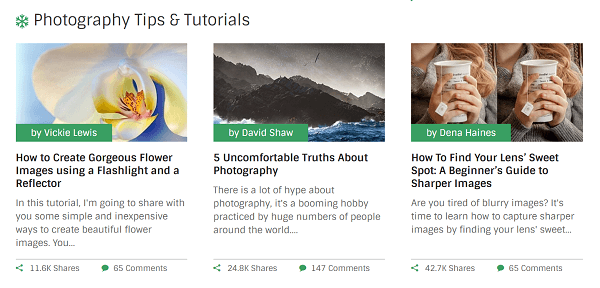
  • Read Digital Photography School’s tips and tutorials, as well as examples of a challenge and discussion post.
  • Listen to the first podcast in ProBlogger’s blogging groove series.
  • Check out the Create Content portal and get a free download with blog post ideas.
  • Read ProBlogger’s Start Here page.
  • Learn more about welcome mats on SumoMe and OptinMonster.
  • Get information on Google’s announcement about penalizing sites that interrupt the mobile experience.
  • Check out Patch.
  • Watch our weekly Social Media Marketing Talk Show on Fridays at 8 AM Pacific on Huzza.io, or tune in on Facebook Live.
  • Learn more about Social Media Marketing World 2017.


What do you think? What are your thoughts on blogging? Please leave your comments below.


Source

Monday, 28 November 2016

8 Social WordPress Plugins to Improve Your Blog


Do you want to make your WordPress blog more social media-friendly?
Looking for easy-to-use solutions?
WordPress plugins are simple to install and make it easy for you to incorporate socially focused functionality on your blog.
In this article, you’ll discover eight plugins to socialize your WordPress blog.

#1: Share Blog Posts Automatically With Blog2Social

Sharing new blog posts on social media is pretty much mandatory at this point. You want as much content exposure as possible, but posting from your blog to your social channels takes time.
That’s where the Blog2Social plugin comes in. It lets you automatically schedule and share your new blog posts to your social media channels. You can customize your posts for each network if you want and schedule them at optimal times for each audience.
The Blog2Social WordPress plugin lets you automatically share new blog posts on your social media channels.
This plugin is free, but there’s a premium upgrade available starting at $49/year.

#2: Create Tweetable Content With Better Click to Tweet

Better Click to Tweet is a simple Twitter sharing plugin that lets you create tweetable content from your blog posts that readers can share with their followers.
The Better Click to Tweet WordPress plugin lets you insert click to tweet boxes into your blog posts.
When readers click the Click to Tweet box in your blog post, a pre-populated tweet with the article link will appear, ready to be shared on Twitter.
The Better Click to Tweet WordPress plugin displays pre-populated tweets for users to share on Twitter.

#3: Stream Instagram and Twitter Feeds With Social Streams

If you want to display your Twitter and Instagram feeds on your blog, the Social Streamsplugin is for you. Just connect your feeds and the plugin will merge them into a single feed on your website.
The Social Streams plugin will merge your social feeds into one page to display your engagement across social channels.
You can tweak the plugin with CSS so you can tailor it to your theme. With its plug-and-play features, it will showcase everything that’s happening on your Instagram and Twitter accounts.

#4: Customize the Display of Your Instagram Posts With Instagram Feed

If you want to integrate your Instagram profile with your website in a visually appealing way, consider the Instagram Feed plugin. It offers gorgeous layouts and powerful functionality. The plugin is free, but there’s also a pro version with additional features.
The Instagram Feed WordPress plugin lets you display your Instagram feed on your blog.
By default, your feed will match the style of your WordPress site, but you can customize it. For example, you can choose the number of photos and columns and the size of the photos. The display is responsive and looks good on mobile devices.
The Instagram Feed plugin lets you tweak various settings and sort images by date.

#5: Encourage Pinning of Your Images With Pin It Button

Among social media platforms, Pinterest draws a unique crowd with its premise of being “the world’s catalog of ideas.” Pinterest users can create boards that become repositories of interesting items. To encourage users to pin your content, provide a Pin It button with your posts.
With the free version of the Pin It Button plugin, users can select the image they want to pin, although you can preselect a default image. You also have the option to customize the button’s size, shape, and color.
The Pinterest Pin It button offers a wide range of customization options.
The Pin It button is a must if you post lots of images on your blog, especially original images designed with care and creativity.

#6: Add Sharing Buttons With Shareaholic

The free Shareaholic WordPress plugin is described as an all-in-one content amplification platform. It lets you add sharing buttons for the top social media websites to make it easy for readers to share your blog content. The plugin is easy to install and use.
The Shareaholic WordPress plugin lets you change a number of settings in the configuration panel.

#7: Link to Your Social Profiles With Simple Social Icons

Of course, you want people to like and follow your social media profiles so they’ll know when you share new content from your blog. It’s also a good way to keep tabs on their interests and interact with them.
Simple Social Icons is a free WordPress plugin that makes it easy to display social media icons on your blog that link to your profiles. You can customize the icons’ size and color, and their alignment on the page.
By including social links on your blog, you’re inviting readers to check out your profiles, and if your content appeals to their interests, hopefully they’ll follow your accounts.
Simple Social Icons is an easily customizable plugin that lets you post links to your social channels on your blog.

#8: Control the Look of Your Content on Facebook With WP Facebook Open Graph Protocol

Facebook’s Open Graph Protocol controls the metadata that shows up when you share a blog post, including the title, description, author name, author link, keywords, and thumbnail. The WP Facebook Open Graph Protocol plugin allows you to tweak the Open Graph metadata of your blog posts.
Typically, you’d have to edit the header of your website theme to put in the appropriate Open Graph metadata format for your blog posts. This plugin will let you make changes without having to know HTML/CSS. Adding proper tags and values can increase shareability of your content.
The WP Facebook Open Graph Protocol plugin adds proper tags and values to your blog to increase shareability.
Over to You
These are just some of the social media plugins you can install on your WordPress blog. As you can see, they offer a variety of features, so it’s worth finding out which ones will suit your needs.
What do you think? Have you used any of these plugins on your blog? Which ones are your favorites? Share your insights in the comments below!

Source

Wednesday, 16 November 2016

8 Must-Have Ingredients of a Successful Blog Post


When it comes to marketing online, you’ve probably already heard that “content marketing” is one of the best ways to spread the world about your site and position yourself as an industry expert. But content marketing is not the same as churning out blog posts day after day. 
There’s more to a great blog post than just words on a screen. What follows is my list of essential ingredients for a successful blog post. If you’ve been focusing on just publishing words each day, step back, consider this list, and find out how your blog might improve. 


1. The article needs a point 

I’m surprised at how many blog articles have nothing to say. Well, maybe they have plenty of things to say, but they don’t have a point. An article is supposed to communicate a point.

When your article has a point, it gives readers something memorable to latch onto. They are more compelled to share it, comment on it, and engage with it. An article with a point is an article that accomplishes a mission and is therefore successful. 
There’s another benefit to having a point: Using specific keywords. As part of a content marketing effort, you probably went through the exercise of planning the keywords to target, and creating content that would advance those keywords. Now, you can implement those keywords by writing an article with a succinct point.


2. Images

You won’t see an article on my blog without an image. It just doesn’t happen. I know that content is the most important thing for search engines and crawlers, but I’m not writing great stuff so crawlers can read it. I’m writing content so you can read it. And I know that you want pictures.

Your goal isn’t just to add eye candy, though that’s probably a good thing. Your goal is to add strategic images that help your readers, and enhance your content. 

3. Structure

This is one of the most-overlooked aspects of an article. In order to communicate a concept, you need to organize your thoughts. Otherwise, you’re going to have a scattered assembly of sentences and statements. That accomplishes nothing.

When you have a structure, it will be reflected in the layout of the article. An article will have headings, subheadings, paragraph breaks, and maybe a bullet point or two. All of these features provide flow for the reader, and make it easy to skim and digest content.

Here’s the model you should follow:

  • Introduction: Set the stage for your discussion.
  • Make your point. Explain it. 
  • Make your next point. Explain it. 
  • Do this for as many points as you have.
  • Conclusion: Wrap up the article with a call to action. 
That’s the general idea. However, it needs some specificity depending on the type of article you’re creating. In my Advanced Guide to Content Marketing, I discuss 12 structures to help you have an organized approach to virtually any type of content. 

4. Unique content

First, you need to have something unique to say, from a thematic perspective. In other words, you don’t simply want to make the same point that everyone else is making. You need to have a unique angle, approach, or spin. 

Second, you need unique content. You hopefully wouldn’t copy and paste content from another site onto your own. But you may be tempted to do a link roundup or “best of the web,” in which you curate a list of articles that you’ve found to be interesting. 
I think this is a fine idea, and it can certainly help you to establish thought leadership and gain readership. However, because of the risk of duplicate content, I’d suggest doing this infrequently. Unique content is more likely to be linked and shared. People are going to go to your content because it’s one of a kind.

5. Substantial length

Ah, the perennial question: How long should my blog post be? 

The short and easy answer is, as long as it takes to say what you need to say. But -- and this is a significant “but” -- longer is better. 
My research, experience, and data all point to long-form content performing better in social sharing, search indexing, organic traffic, and conversions. If you’re regularly creating content that is in the 1,000- to 1,500-word range, you’re doing well. If most of your articles are about 200 to 300 words then you could probably beef up a bit. 

6. Internal linking

An internal linking strategy -- for which you link to other, related posts within your own site -- and can serve to enhance and deepen the overall value of a website. It isn’t complicated. Here are the basic points:

  • Create enough content throughout the site. You’re going to need stuff to link to.
  • Create text links with diluted anchors. No optimized anchors allowed. In other words, the text of the links (the part people click on) shouldn’t contain keywords.  
  • Link internally to “deep pages.” The deeper the link is within your site, the better. A good example of this is linking to pages that are not your home page, or any other major page on your website.
  • Use links that the reader will be interested in. You want them to engage with your content and site.
  • Link to relevant data on your site. Topical relevance between the pages will bolster the authority of both pages. 
  • Use enough internal links to make it worthwhile. I’d suggest anywhere from 3 to 10 internal links per post.

7.  Attention to proper spelling and grammar

When I first drafted this article, I wrote this point as “Make your article grammatically impeccable.” And then I changed it. It needs to be proofread and copyedited...at least.

Let me share a thought or two about mistakes. To err is human. Mistakes happen. Now and then, a typo will slip through. Work to avoid it, but be prepared to accept it. Being human has its drawbacks. 
Here’s a helpful approach to proofreading and copyediting your articles: 
  • Just write the article. Don’t nitpick, parse, check thesaurus, or fix your spelling. Simply put the content on the page -- structured, organized, but not proofed. 
  • Wait a few hours. A day is even better. You’ll be able to look at it with fresh eyes when you go in for the copyedit phase. 
  • Copyedit the article. Here’s where you give the article a renovation. You may change entire paragraphs, elide sections, alter wording, and adjust your approach. Your goal is to make the copy read well. 
  • Proofread the article. Examine every comma, apostrophe, capital letter, and spelling issue. This is where you make sure your article will pass muster in a college-level composition course. When you’re done, proofread it again.

8. A call to action 

The call to action is the magic ingredient that makes a blog post worth it all. You have all this wonderful long content with an amazing point, a beautiful structure, internal links, great images, and flawless style and grammar. Now what? 

Every post needs a call to action. The reader is ready to respond, to do, to click, to engage. What do you want them to do? Whether it’s capturing an email address, visiting another page, purchasing a product, or downloading an ebook, you need to have an explicit call to action for each article, every time.
Call to actions are the key to bringing in more conversions. Truly effective calls to action begin and end with strong, compelling copy. 
So, write your copy, but don’t stop there. Write your call to action as well.
I could have ended this list by telling you “Write a conclusion.” Of course you need a conclusion. Any article needs to have a clear ending. But somewhere in that ending needs to be an appeal -- the reader should be invited to take the next step or do the next logical thing. 
If you scroll to the end of this post, you’ll see an example of my call to action. It’s at the end of every article. 

Conclusion: Churning out content on a blog is not the path to success. Carefully consider your strategy in light of these eight points. If you have an approach that follows this methodology, then you’ll start to see significantly higher success rates with your content marketing.

What other must-have blog tips would you suggest?